Here you will find the instructions for the initial startup of the TANlock with the current software version:
1. Connect your computer to the network
a) Open Network and Sharing Center
b) “Connections: Open Ethernet
c) open “Properties
d) click on version 4 (TCP/ IPv4) and open properties
e) Click on “Use the following IP address
IP address: 192.168.0.30
Subnetmask: 255.255.255.0
f) click “ok” and close all windows
The default settings of the TANlock are:
DHCP disabled / fixed IP: http://192.168.0.90, Subnetmask: 255.255.255.0
VLAN disabled,
2. connection of the TANlock via a web browser
a) Open the web browser (e.g. Google Chrome)
b) Enter the IP address http://192.168.0.90 in the address line
c) Log in with name “api” and password “lab” and then click the “Login” button.

Each TAM has RFID as its base. Further options such as PIN are superimposed on the RFID.
1.1 Select Device Type
1.2 Activate medium
1.3 Create User
1.4 Assign medium to a user
PIN
RFID
FINGERPRINT
A maximum of two fingers can be stored per user.
In the tab of the administration screen you will find the current settings of the TANlock. You can make changes here.

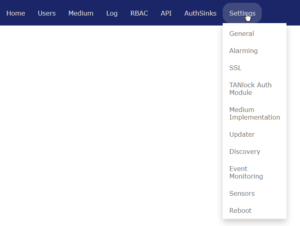
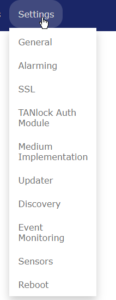
The following tabs are available in the tab:
Save changed settings on the TANlock by clicking on “Save”.
You can refresh the settings display by clicking on “Refresh”.

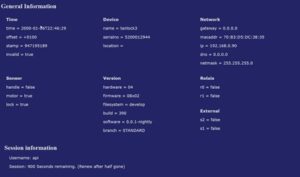
The Home tab displays the following information:
Time displays the current time as well as the date.
Under Device is the product name and the corresponding serial number of the TANlock.
Under Network you will find the following information: IP address, netmask and mac address.
The internal sensor system indicates the following states: TANlock open or closed, lever turned.
Firmware Information.
External connection of up to two signal transmitters possible: False= inactive and true= active.
Connection of two door contacts possible.
Logged in user and expiration of the session after 900 seconds (After that new login necessary).
2. Tab “Settings“

The following fields are available in the “Network” tab:
„
Activation and deactivation of the available media.
If you are interested, please contact your FATH Mechatronics representative.
Activation, deactivation and setting of optional sensors (Currently available sensors: temperature and humidity).
Restart of the TANlock.
Tab “AuthSinks“:
Tab “API”:
Tab “RBAC”

The following fields are available in the “RBAC” tab:
Here are the predefined roles with their permissions. The “Add Roles” button can be used to create new roles with their selected permissions.
Management users with different roles can be created and managed here.
Tab “Log”
All events on the TANlock are tracked in the “Log” tab.
Tab “Users”
Authorized users who are allowed to operate the TANlock are created here via the “Add User” button. This can also be deactivated or deleted here.
Karteikarte “Medium”

The following fields are available in the “Medium” tab:
In this case, please contact Oliver Jasorka at oliver.jasorka@fath-mechatronics.de or +49 91757909-154.
E-Mail:
info@tanlock.com
Tel.:
+49 9175 8494-500
© Copyright – TANlock GmbH – Alle Rechte vorbehalten